Practical Guide to Making and Selling Graphene-Enhanced 3D Printing Filament
Why Graphene Filament Is the Next Big Thing
Graphene-enhanced filament sits in a sweet spot between “novel material” and “useful product.” Most buyers in the 3D printing world do not want chemistry for its own sake. They want a filament that prints reliably and offers a visible performance benefit. Graphene can help with stiffness, heat dissipation, surface finish, and in some formulations, conductivity. Even when the gains are modest, the marketing story is strong: a premium material with a technical edge.
The practical business opportunity is not to claim miracle performance. It is to sell a well-made, consistent filament that performs slightly better than standard PLA or PETG in specific ways. That is enough for makers, product designers, robotics hobbyists, and engineering teams to pay more than commodity filament prices.
The best use case is not “replace all filament.” It is “offer a specialty filament for users who want tougher, cooler-running, more premium-looking prints.” If you position the product correctly, graphene filament can command a higher price per spool while keeping raw material costs manageable.
The 3D Printing Market Explosion
The 3D printing market has expanded far beyond hobbyists. Today buyers include schools, makerspaces, Etsy sellers, product development teams, small manufacturers, repair shops, and prototyping labs. That matters because specialty filament sells best when there is a reason to upgrade from standard PLA.
In practical terms, the market is segmented into:
- Beginners who want easy printing
- Hobbyists who buy based on color and novelty
- Power users who care about performance
- Businesses that want repeatable results
Graphene-enhanced filament is most attractive to the last two groups. They are willing to pay for materials that solve a problem, such as:
- Better heat resistance than basic PLA
- Improved layer feel and surface finish
- Higher stiffness for prototypes
- Potential conductivity or antistatic properties in some formulations
- A premium “tech” story for product branding
A small filament brand can compete because buyers often look for niche performance rather than the cheapest spool. If your product prints cleanly and your marketing is credible, you can win customers without large-scale manufacturing.
Startup Costs (under $800 with a filament extruder)
A lean startup is possible if you already have basic workshop tools and buy used or entry-level equipment. The key is to keep the first production run small and validate demand before scaling.
A realistic under-$800 starter setup:
- Used or budget single-screw filament extruder: $350 to $500
- Spool winder or simple motorized winder: $40 to $100
- Digital caliper: $15 to $25
- Kitchen scale or small bench scale: $15 to $30
- Infrared thermometer or thermocouple probe: $20 to $40
- Filament dryer or food dehydrator: $40 to $80
- Ventilation/fume extraction basics: $30 to $60
- Starter raw materials: $80 to $150
That total can land around $600 to $800 if you buy carefully.
You also need consumables:
- PLA or PETG pellets
- Graphene additive or graphene masterbatch
- Color masterbatch if needed
- Desiccant
- Spools and packaging
For a first batch, plan on 5 to 10 kg of finished filament. That is enough to test process stability, print samples, and sell to early customers.
Pricing strategy:
- Standard PLA filament sells around $15 to $25 per 1 kg spool
- Premium specialty filament can sell for $28 to $45 per spool
- Graphene-enhanced filament should usually be positioned around $32 to $42 per spool at launch
If your production cost is around $8 to $14 per spool, you have room for margin, packaging, and marketplace fees.
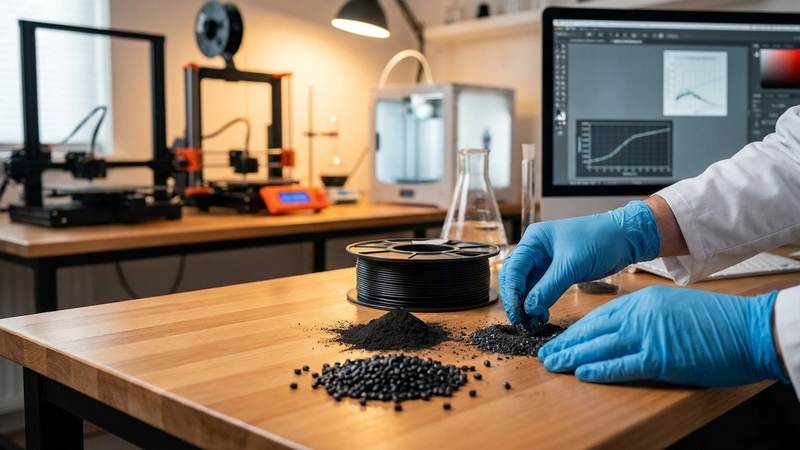
How to Add Graphene to PLA and PETG Filament
The safest and most practical route is to use graphene in masterbatch form rather than raw nanopowder. Masterbatch is easier to dose, reduces dust exposure, and improves dispersion. If you must use raw graphene, handle it with proper PPE and dust control, because fine powders are messy and potentially hazardous.
Recommended starting concentrations:
- PLA: 0.5% to 2.0% graphene by weight
- PETG: 0.5% to 1.5% graphene by weight
Start low. Too much additive can make extrusion unstable, increase brittleness, and worsen diameter consistency.
A practical starting formula for PLA:
- 98.5% PLA pellets
- 1.0% graphene masterbatch
- 0.5% color masterbatch if needed
For PETG:
- 98.0% PETG pellets
- 1.0% graphene masterbatch
- 1.0% color masterbatch if needed
Process notes:
- Dry PLA at about 45 to 55 C for 4 to 6 hours
- Dry PETG at about 60 to 70 C for 4 to 6 hours
- Keep all feedstock dry before extrusion
- Preblend pellets and additive thoroughly in a sealed container or tumble mixer
- Feed slowly and consistently to avoid surging
Extrusion temperatures:
- PLA: start around 175 to 195 C
- PETG: start around 225 to 245 C
Every machine is different, so run temperature trials. For PLA, too hot can cause darkening and brittleness. For PETG, too cool can lead to poor melt mixing and inconsistent diameter.
If your extruder has zones, try:
- PLA: 170/180/185 C
- PETG: 225/235/240 C
Cool the filament quickly and evenly after extrusion. Uneven cooling can cause ovality and diameter drift. Use a controlled air path rather than a fan blasting one side.
Quality Control and Diameter Consistency
Diameter consistency is what separates a hobby product from a sellable brand. Buyers will forgive a slightly glossy spool label. They will not forgive jammed prints.
Target tolerances:
- 1.75 mm filament: aim for 1.75 mm ± 0.03 mm
- 2.85 mm filament: aim for 2.85 mm ± 0.05 mm
If you are starting out, keep it simple and measure every sample batch manually:
- Measure diameter every 1 to 2 meters during a run
- Check at 0, 90, 180, and 270 degrees around the filament
- Record average diameter and ovality
- Reject or downgrade any batch with large variation
Practical QC checklist:
- Dry raw material before extrusion
- Keep extrusion speed steady
- Maintain stable melt temperature
- Use a consistent puller/winder speed
- Measure spool weight and label it accurately
- Print a test cube from every batch
Weight consistency also matters. A “1 kg spool” should be close to that. Many brands lose trust by underfilling. If you sell 1 kg, make sure the net weight is honest and clearly labeled.
A simple quality standard:
- Diameter variance under 0.03 mm
- No visible bubbles
- No dark burn streaks
- Smooth winding
- Clean spool edges
- Consistent print behavior in a standard test model
Printing Test Pieces and Marketing Samples
Before selling, print your own benchmark models. This is both a technical test and a marketing asset.
Use the same models every time:
- 20 mm calibration cube
- Benchy
- Thin wall test
- Bridging test
- Heat-resistant functional part
- Surface finish sample
Recommended print settings for testing:
- PLA graphene blend: nozzle 200 to 220 C, bed 55 to 65 C
- PETG graphene blend: nozzle 235 to 250 C, bed 70 to 85 C
- Fan: 30% to 100% depending on material and part geometry
What to document:
- Print speed
- Layer height
- Nozzle size
- Bed temperature
- Retraction settings
- Surface quality
- Warping
- Stringing
- Layer adhesion
Make photo-ready samples for sales:
- A clean Benchy
- A functional bracket
- A geometric art piece
- A logo plaque
- A transparent or matte comparison piece if relevant
Your marketing samples should show the material advantage, not just the color. If graphene improves stiffness or surface sheen, photograph that clearly. If it prints especially cleanly, show close-ups.
Selling to the 3D Printing Community
The 3D printing community buys from people they trust. That means you need education, transparency, and responsiveness.
Practical ways to build trust:
- Publish exact print settings
- Explain graphene percentage honestly
- Show real photos, not stock images
- Offer sample spools or 250 g trial spools
- Respond quickly to printer compatibility questions
- Admit limitations, such as “not for ultra-flexible parts”
Community buyers often ask:
- Will it clog a 0.4 mm nozzle?
- Is it abrasive?
- Does it need a hardened nozzle?
- Is it conductive?
- Is it stronger than standard PLA?
Prepare clear answers:
- If the graphene loading is low, clogging risk should be similar to normal filled filament
- For safety, recommend a hardened nozzle if your additive is abrasive
- Be careful with conductivity claims unless tested
- Do not overstate mechanical improvements without data
A good tactic is to launch with a “maker edition” and an “engineering edition.” The maker version can focus on print quality and finish. The engineering version can emphasize repeatability and documented properties.
Online Marketplaces and Direct Sales
Start with channels that already have traffic, then move toward direct sales for better margins.
Good sales channels:
- Etsy for maker-friendly retail
- eBay for broad exposure and low barrier to entry
- Amazon Handmade or Amazon seller account if you can handle fees and competition
- Shopify for direct-to-consumer brand building
- Facebook groups and Reddit communities for niche awareness
- Discord servers and maker forums for early adopters
- Your own website for repeat sales and B2B inquiries
Marketplace pricing example:
- 1 kg spool: $34.99 to $44.99
- 500 g spool: $19.99 to $24.99
- 250 g sample spool: $9.99 to $14.99
Direct sales usually allow better margins:
- Sell on your own site at $32 to $39 per kg
- Offer bundle pricing: 3 spools for a small discount
- Offer sample packs with 3 colors or 3 formulations
Practical shipping advice:
- Use sturdy boxes to prevent spool damage
- Seal filament in bags with desiccant
- Include a printed spec card
- Keep shipping weights accurate to avoid profit loss
Custom Filament Orders for Engineers
Engineers and product developers are valuable customers because they buy for function, not novelty. They may want a specific stiffness, color, diameter, or additive level.
Useful custom order options:
- 1.75 mm or 2.85 mm
- Custom graphene loading from 0.5% to 2%
- Matte or satin finish
- Black, gray, or natural base colors
- Small pilot runs of 5 to 20 kg
- Documented batch numbers
How to price custom orders:
- Base price: $35 to $45 per kg
- Small-batch custom fee: $50 to $150 setup charge
- Engineering sample packs: $25 to $75 depending on quantity
For custom clients, provide:
- Material data sheet
- Recommended print temperatures
- Batch ID
- Diameter tolerance
- Moisture handling instructions
- Notes on nozzle wear and post-processing
Engineers appreciate fast communication. If you can quote within 24 hours and ship a sample within a week, you will look more professional than larger competitors.
Building a Filament Brand
A filament brand is built on consistency, not hype. Your first goal is to become known as the seller who always ships dry, clean, and accurately labeled filament.
Brand-building essentials:
- Choose a simple product name that sounds technical but clear
- Use consistent label design and spool colors
- Publish specs on every listing
- Add a QR code to a test print page
- Include batch numbers on every spool
- Keep your messaging focused on performance and reliability
Good brand positioning examples:
- Premium maker filament with graphene-enhanced finish
- Engineering-grade PLA blend for stiffness and aesthetics
- PETG blend for durable prototypes and functional parts
Avoid overclaiming. Do not say graphene makes the filament dramatically stronger unless you have data. Instead, say it is designed to improve print feel, stiffness, thermal behavior, or surface quality depending on the formulation.
A practical launch plan:
1. Make a 5 kg pilot batch
2. Print and document test pieces
3. Sell 10 to 20 sample spools
4. Collect feedback
5. Adjust formulation and extrusion settings
6. Launch a small batch on Etsy and Shopify
7. Offer custom orders to local engineers and makerspaces
8. Build repeat buyers through consistency
The best graphene filament business is not built on the word graphene alone. It is built on clean extrusion, honest claims, reliable print results, and a brand that feels like it belongs in serious makers’ hands.
If you can produce a filament that prints well, looks premium, and solves a real need, you can turn a small extruder setup into a credible specialty materials business.
Evaluate Our Quality
Serious about B2B integration? Test our premium Pulsed Electrical Resistive Carbon Heating turbostratic graphene in your lab. 100g sample packs available now.